How to improve efficiency with key NetDocuments features part 1 of 2: Saving time and clicks
When it comes to improving work processes, have you ever created a list of steps, cut out the ones that seemed meaningless, and then considered your task of processes improvements complete? If you have, or been tempted to, you’ve come to the right place.
Unfortunately, while listing the steps in processes can help organise your thoughts around improvements, stopping your journey at this point is akin to leaving money on the table.
To extract true opportunities for improvement, a list of steps must be analysed with a keen eye for detail. At Affinity, we generally approach this analysis in two ways:
- Identify seemingly small inefficiencies in an otherwise efficient process and make minor improvements to address them.
- Identify processes that are broken and find a new, more efficient way.
For legal professionals around the world, NetDocuments can support workflow improvements in both approaches. The NetDocuments platform offers numerous functions that save lawyers and their staff a click here, and a keystroke there, adding up to substantial time savings. And, when it comes to dramatic improvements, NetDocuments has features and tight integrations with other technologies that can significantly improve everyday processes.
In part one of this two-part series, I will focus on our first approach and share how NetDocuments can improve your workflow with small, yet impactful, efficiency gains.
Read part two, where I will help you explore how NetDocuments can fix your broken processes.
Simple Tips to Save Time and Clicks in NetDocuments
Whenever you adopt a new software, it can feel overwhelming at first and it’s easy to miss small features that will smooth your day-to-day processes.
Profile Templates, homepage customisation, default locations in ndOffice, and saved searches are just four of those often overlooked features that can reduce how many times you click or change screens in the platform, ultimately helping you be more efficient and productive.
1. Profile Templates
If you are repeatedly filling in the same fields, the same way, it’s time to look at using Profile Templates.
Profile Templates are a simple way to pre-fill one or more profile attributes at once. A simple example is something like an ‘Author’ field. Rather than type your name every time you save a document, you can setup a Profile Template to automatically fill it in each time you upload a document.
How to Set Up a Profile Template
- Create a template: There are several ways to do this, but all of them involve some sort of document save. One of the easiest ways is to upload a document to the cabinet where you want the template stored.
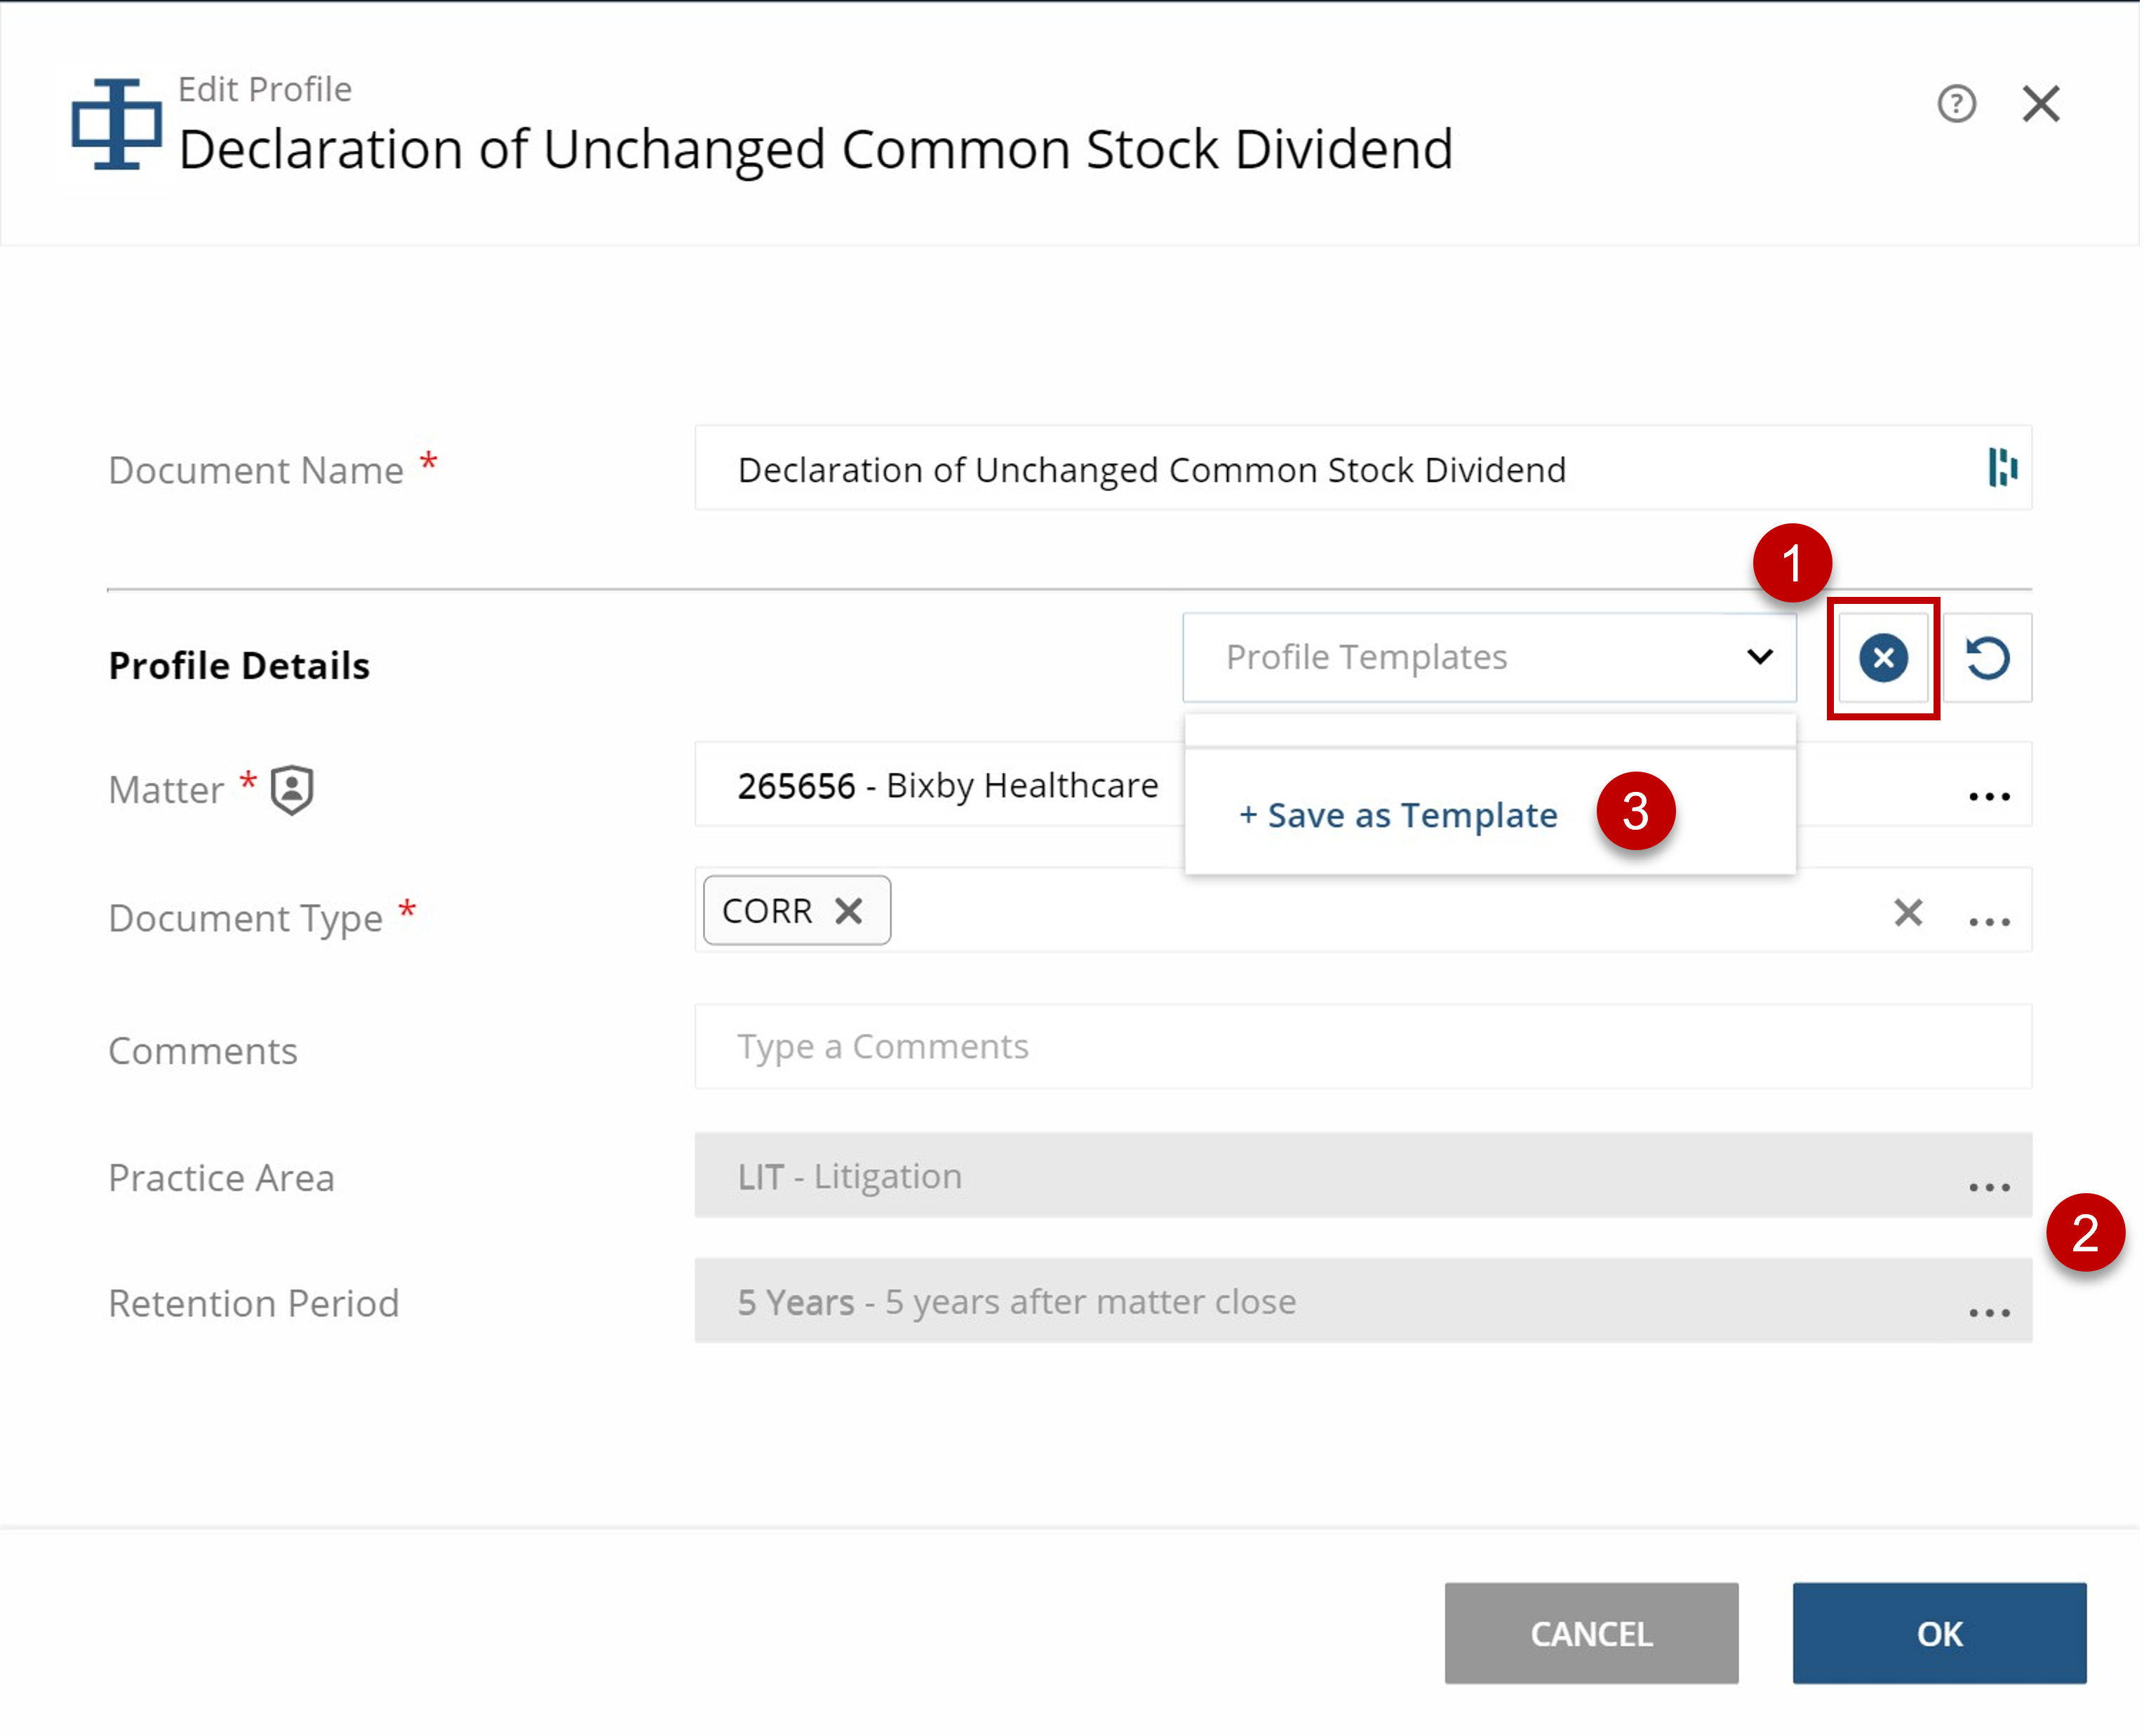
- Enter profile information: Once you have uploaded and selected the document, click Edit Profile/Tags to open a dialog where you can enter the profile information. Start by clearing anything that appears in the fields. Within the Edit Profile dialog, there is a handy Clear Profile option to make this nearly effortless.
- Fill in any fields default value fields: To complete your profile template for our ‘Author’ example, simply complete the Author field with your name. When finished, click Save as Template and then name your template accordingly.
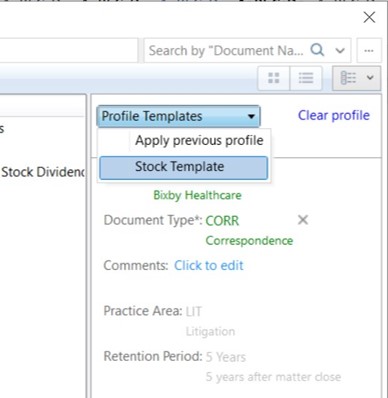
Now that you have created your template, it is available anytime you save a document. For example, just look for Profile Templates within the ndSave dialog box.
Extra Time Savings
Setting a Profile Template as a default cabinet template is a smart idea if you are searching for ways to cut out more steps in your workflow. To do this, simply select Settings from the “Hi menu” and then Application Settings. Scroll to the bottom of the Applications screen and choose a cabinet and the Profile Template you would like to set as the default.
If you were to set your new ‘Author’ template as the Profile Template for a cabinet, the next time you saved a document inside of the assigned cabinet, the template would be applied by default and automatically fill in the Author field with your name.
2. Homepage Customisation
Constantly searching for the same few matters or documents? Consider customising your homepage. Most NetDocuments users already have some homepage customisation, but here are 4 organisation tips that will make your homepage especially useful:
3. ndOffice Default Locations
You can choose the default location ndOffice displays when opening or saving from Word, PowerPoint, Excel, etc. and even choose separate default locations for Outlook.
This simple setting can save you time and decision fatigue, and is all accessible via the ndOffice application.
How to Create Default Locations in ndOffice
- Open the dialogue box: From the Activity Center, select the gear/cog symbol and choose Settings, then click on the Navigation tab.
- Select your default settings: Choose your settings wisely, based upon the way you normally work. For example, I tend to open documents that are already in recent documents, and I tend to save to a recent workspace within my organisation’s Clients cabinet. My settings reflect this.
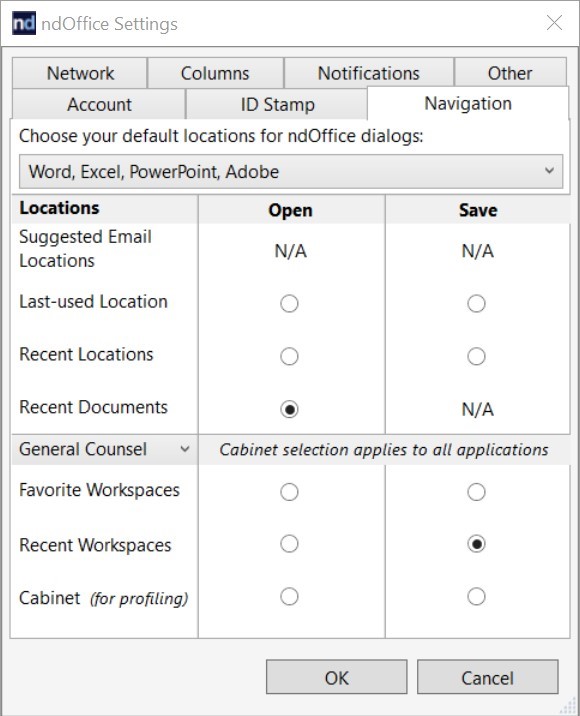
Setting a default location does not mean that you cannot manually change the location displayed when you Open or Save a file. It simply changes what is initially displayed by default, which can save you a few clicks and decisions over the course of your workday.
4. Saved Searches
Saved Searches are one of many hidden gems in NetDocuments. This feature has various uses beyond the obvious ability to save search criteria, and can save you time and effort when used correctly. Here are just a few of the ways you can use Saved Searches to your advantage every day:
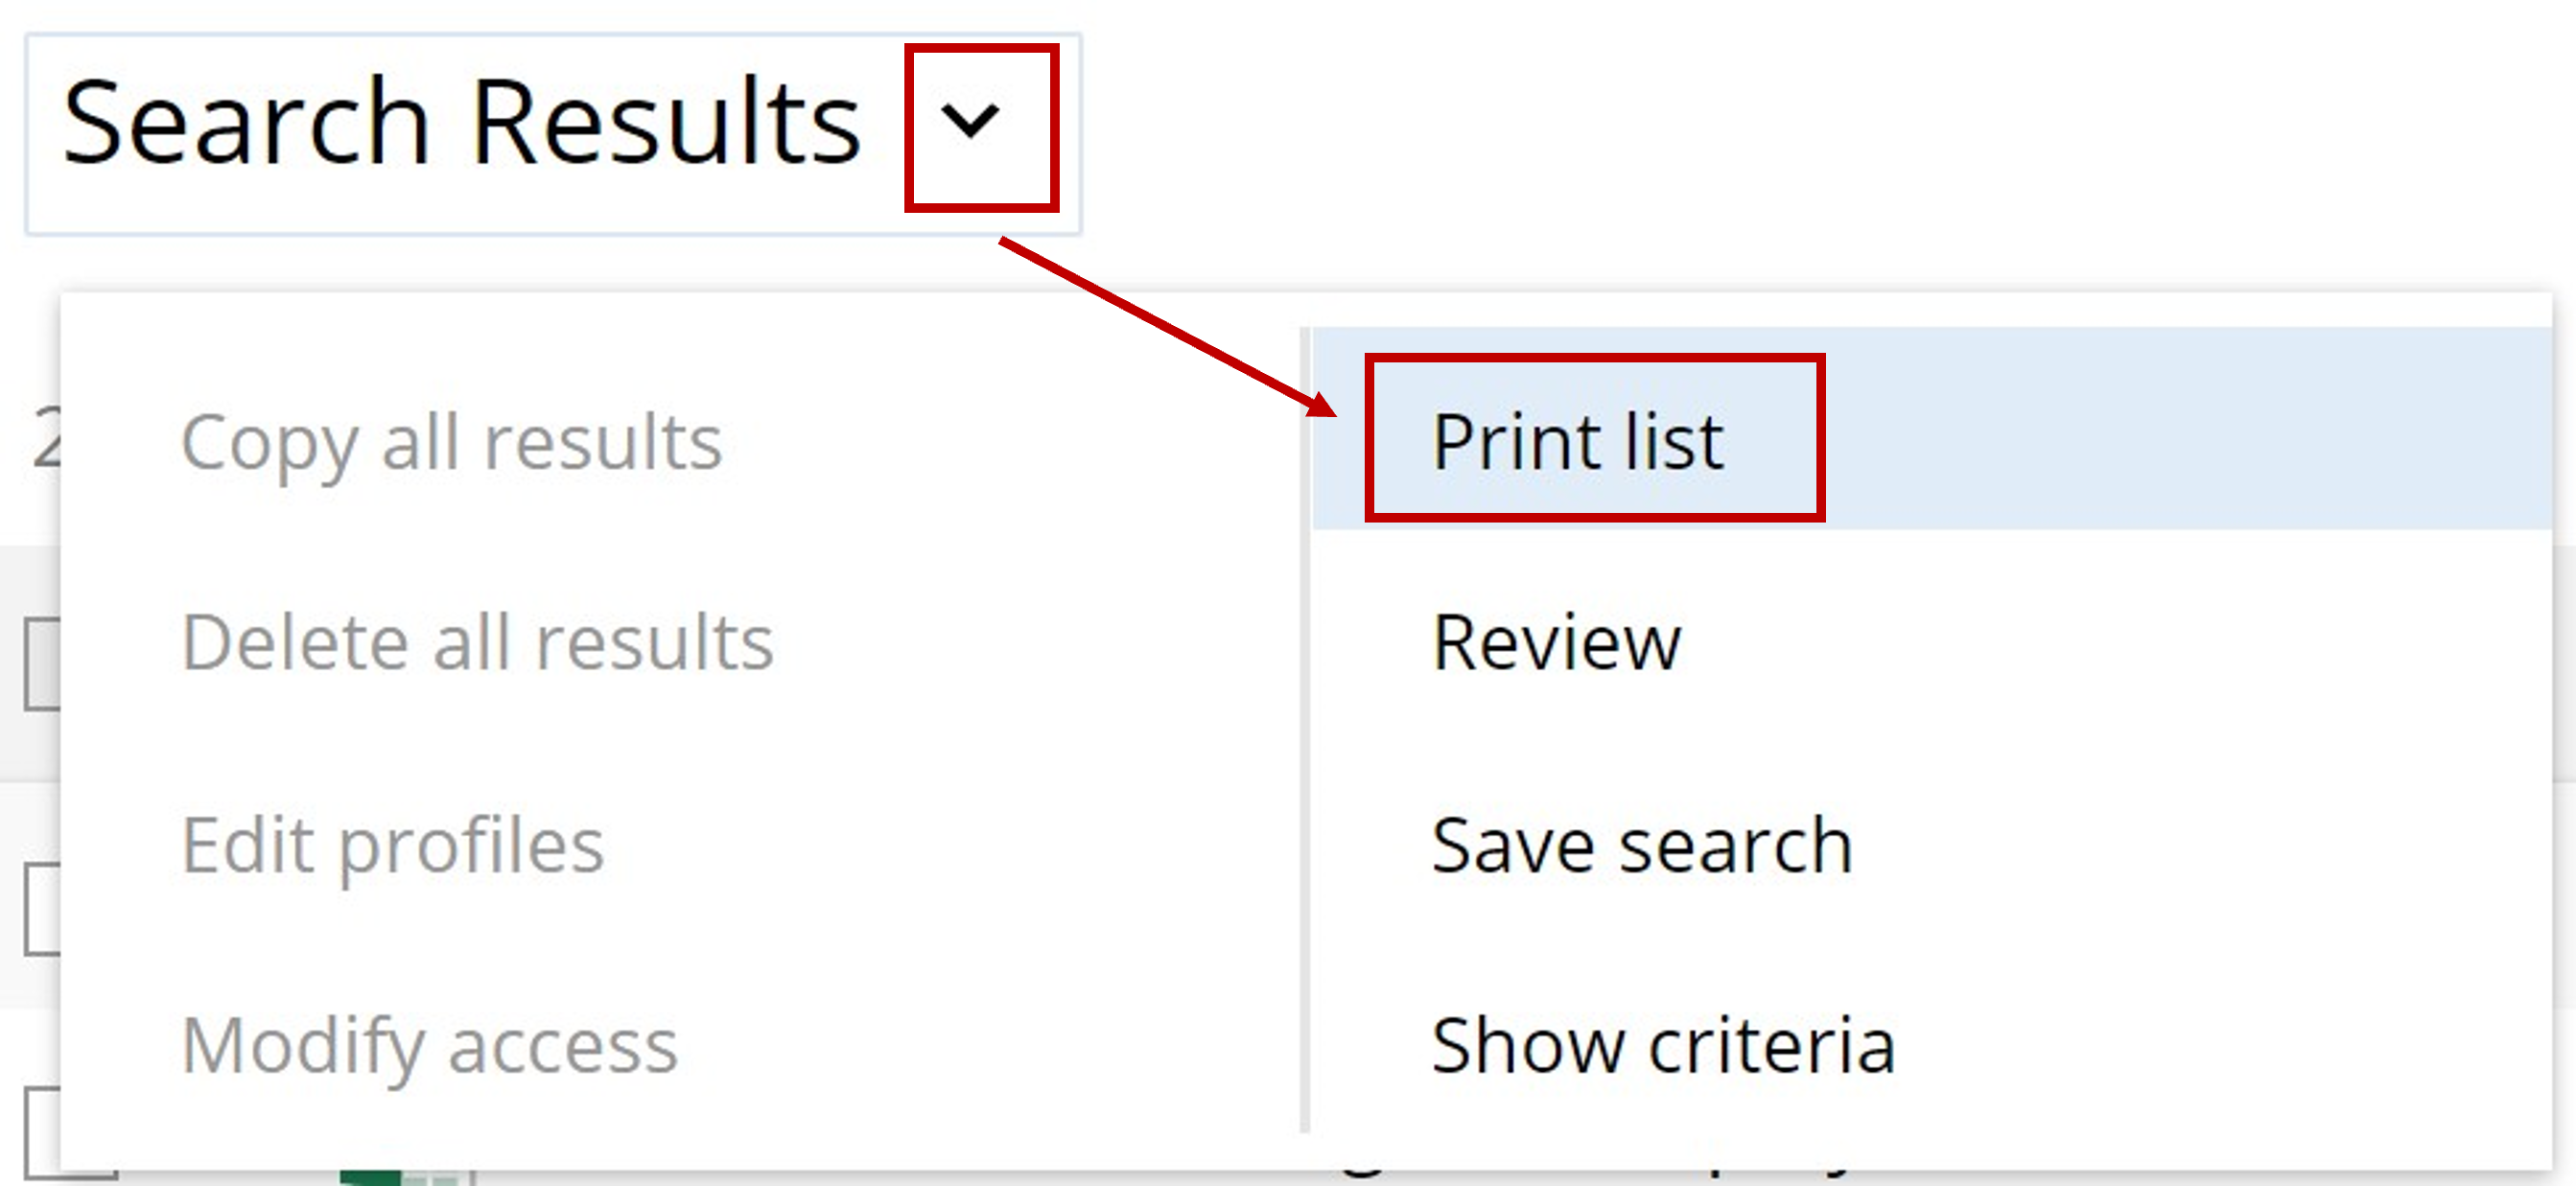
How to Create a Saved Search
Creating a Saved Search in NetDocuments is very easy and intuitive.
Remember: Saved Searches belong to you, not the organisation, and can help you customise file organisation in a way that makes sense to you personally without impacting your company’s filing methods.
Conclusion
In the first part of this two-part series, I have touched on the various hidden gems and functions within NetDocuments that can save you a click here and there, or perhaps a change of screens now and then. When used together, these little improvements can compound over time and have significant impacts on both your personal and organisation efficiency.
In part two of this series, I will share NetDocuments tools that can have a dramatic impact on workflow by changing (or even removing) your processes for the better.
Ready to take your workflow to the next level? Affinity Consulting can help you implement NetDocuments for the first time or optimise your existing NetDocuments workflow. Learn more here.

